Quick answer: If a Zebra ZD500R prints VOID across RFID labels or repeatedly fails to encode tags, distinguish ordinary media calibration from RFID tag calibration. Check whether the printer is actually an RFID-enabled ZD500R, whether the roll contains compatible transponder inlays, and whether the label format sends valid RFID data. A good-looking printed barcode does not prove the hidden RFID chip was successfully written.
This independent troubleshooting guide is for authorized UHF RFID operations. Do not overwrite production EPC identifiers while experimenting. Use synthetic test data and non-production RFID labels under your organization’s access and numbering policy. For country-specific radio operation, use only approved hardware, antennas, firmware and regulatory settings.
Why the ZD500R behaves differently from a regular ZD500
The ZD500R is the RFID-capable variant of Zebra’s desktop printer family. The printer both marks a visible label and can program/read compatible RFID inlays when correctly configured. The regular ZD500 print workflow and its media feed controls do not establish that RFID encoding will work.
Zebra’s ZD500R support center and RFID programming guide provide the relevant model-specific diagnostics. This page is about a reader/writer and its tag configuration, not the more general printed-barcode scan problems in our shipping barcode not scanning guide.
Fast diagnosis table
| Observed symptom | Possible layer | Next evidence to collect |
|---|---|---|
| Every RFID label is marked VOID | Calibration, inlay compatibility, encoding position or command | Compare approved RFID roll and printer’s encode report |
| Printed text looks correct but RFID read fails | Transponder programming rather than print engine | Verify with authorized RFID reader and test EPC |
| Error appears only on new RFID roll | Inlay geometry, tag family or changed label pitch | Record exact media SKU, gap and inlay position |
| Normal media feeds incorrectly | Gap/black-mark sensing before RFID | Perform supported media calibration first |
| Encoding succeeds from test utility but not app | Application ZPL/SGD fields or software overrides | Compare format and printer configuration |
| RFID reader is not detected by printer | Hardware, connection or reader state | Check official status message, then service |
1. Confirm you are operating an RFID model
Read the printer’s full hardware designation, firmware family and RFID capability in the official configuration report. A standard non-RFID ZD500 cannot be made into an RFID reader/writer merely by sending RFID ZPL commands. Verify that the correct printer queue or network address targets the actual ZD500R before changing tag settings.
Also distinguish an RFID encoding fault from a communication or ordinary printing problem. If the printer does not accept any jobs, resolve power, USB/network or print queue first. Our connected but not printing diagnostic covers the general print path.
2. Understand what a VOID print is telling you
On an RFID production workflow, a printer may visibly mark a tag VOID after an unsuccessful program/verification attempt so it is not mistaken for a valid encoded label. The exact number of retries, void behavior and status output depend on the printer’s configuration and software. Do not treat a label with legible text but a VOID overlay as usable stock.
Zebra’s RFID programming guide explicitly lists possible causes when an RFID-enabled printer voids every label: unsuitable calibration, wrong programming position, incorrect RFID commands, software settings that override the printer, or failure to communicate with the reader. Identify the relevant cause from actual status evidence instead of disabling invalid-tag handling.
3. Verify the RFID roll and transponder type
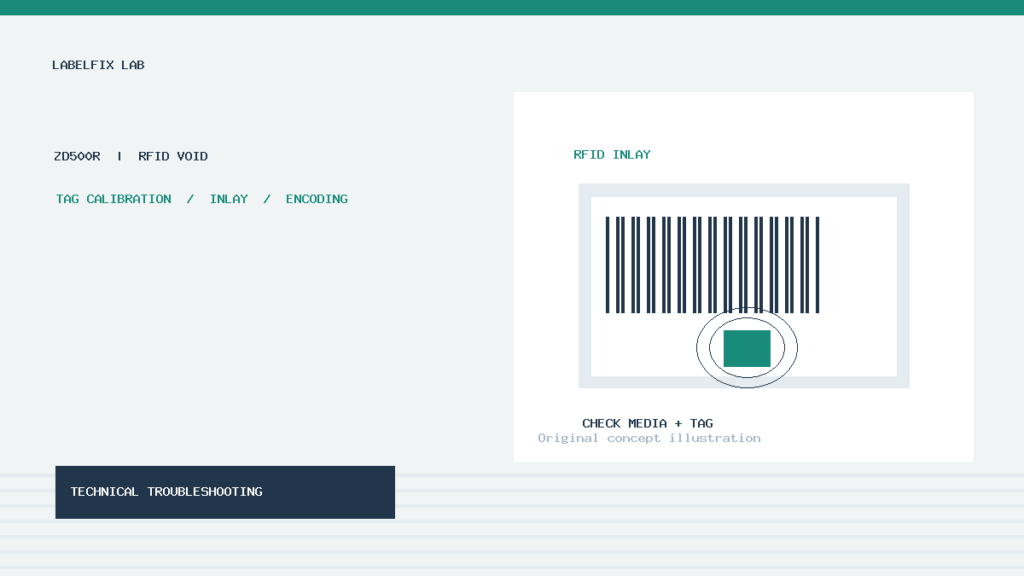
RFID labels have an internal chip and antenna arrangement as well as visible printable media. Two rolls with identical outer dimensions may use different inlay positions or transponder models. A printer calibrated for one roll can fail on another if the chip is not where the RFID antenna expects to communicate.
Record the supplier, exact RFID media part number, intended label dimensions, gap or mark type, inlay placement and chip family. Check the approved tag against Zebra’s RFID transponder inlay placement guidelines. Do not cut open live RFID labels to search for a chip when a supplier drawing or proper test sample is available.
4. Run ordinary media calibration before RFID calibration
Media calibration teaches the print mechanism where one physical label begins and ends. If the printer feeds the wrong pitch, the antenna can be positioned over the wrong part of a label even when the RFID settings appear correct. Load stock according to the ZD500R instructions, verify gap/black-mark sensing and perform the documented media calibration if required.
Do not skip this step simply because visible text sometimes prints. A sensor error can shift the tag relative to the encode position. For a general explanation of physical label sensing, see thermal printer gap and black-mark calibration.
5. Perform the RFID tag calibration using approved media
After the label pitch and supply path are correct, follow Zebra’s documented RFID tag calibration for ZD500R. This procedure can determine a suitable RFID programming position and other reader/write parameters for the loaded inlay. It may advance media, so plan for a small number of test labels rather than a live shipment batch.
The manufacturer’s Link-OS RFID Programming Guide explains calibration concepts and notes that new RFID media may need a fresh calibration. Do not blindly copy an RF antenna position, power value or command sequence from another printer or tag; the optimal values are dependent on the hardware and inlay combination.
6. Compare the programmed EPC with the expected data
An RFID label may print a correct human-readable number but write a different value—or none—to the transponder. Use a permitted RFID reader or the official printer validation method to compare the intended synthetic EPC with what is actually stored. Record a clean pass/fail for both the visible label and chip.
RFID fields have data-format and length rules that may not correspond directly to a plain barcode string. A decimal identifier displayed on a label is not necessarily the same as the bit-level encoding supplied to the reader/writer. Work with the application’s documented EPC scheme and the organization’s assigned identifiers. Do not invent an EPC based on a retail UPC alone.
7. Check ZPL/SGD RFID commands only when the test path differs
If an official RFID test format works but a label-design application voids every label, compare the data and configuration sent by that application. Zebra’s programming materials describe RFID-aware ZPL and SGD operations, programming positions and error reporting. An invalid command, unintended field length or wrong tag type can prevent a write even when the printer’s optical media handling is correct.
Use a supported printer utility to inspect job settings; never paste unreviewed production commands into a live printer. For non-RFID ZPL geometry problems, our ZPL print width, length and origin guide covers a separate layer. Correcting ^PW or ^LL alone does not prove RFID tag encoding is fixed.
8. Check settings that the application may override
A label editor or warehouse system can transmit RFID settings during each job, overriding some previously saved configuration. A manual test may succeed because it uses one profile, while production fails because another application requests a different program position or retry behavior. Compare the actual job source with the successful test method and review the relevant printer status.
Document whether failures affect every label or only particular records. If the same RFID roll and printer encode known-good test data but not one software template, prioritize format validation and application support before replacing hardware.
9. Evaluate intermittent failures across a full roll
Intermittent RFID encoding issues can result from damaged inlays, variable antenna placement in a supply batch, incorrect gap sensing or unstable setup. Record tag failures by roll position and inspect representative labels. If failures cluster on a particular supply lot, compare it with a previously qualified lot and ask the manufacturer for media guidance.
Never accept partially encoded tags based only on one successful barcode scan. If traceability matters, define a documented verification process and reject labels that fail that process. A warehouse user may see the correct printed SKU while the RF system receives no usable EPC at all.
10. When to escalate an RFID reader error
If the device reports that its RFID reader is missing or cannot communicate, reload procedures may not solve it. Zebra’s programming guide includes reader-communication failures in its troubleshooting table and recommends service when a power-cycle and supported checks do not resolve them. Avoid opening the electronics or modifying antenna circuitry without authorization.
Keep a report with exact printer model, firmware, inlay SKU, status/error text, successful ordinary media calibration and failed RFID calibration results. That is much more useful than a generic description of a label that says VOID.
11. Repeatable ZD500R diagnostic sequence
- Confirm ZD500R hardware and printer connection; record the exact status/error.
- Identify the approved RFID label roll, chip and inlay geometry.
- Load supplies and validate physical label media calibration.
- Run Zebra’s ZD500R RFID calibration with non-production media.
- Print and encode a harmless, authorized RFID test format.
- Verify the chip’s stored data with approved reading equipment.
- Compare working test settings with production application commands.
- Escalate persistent reader faults or repeated VOID results to qualified support.
FAQ
Can a regular Zebra ZD500 encode RFID tags?
Not without RFID-capable hardware. Verify whether the installed unit is the ZD500R RFID variant.
Why does a label look perfect but its RFID chip fail?
Visible printing and radio encoding are different operations. The inlay, antenna position, programming command or chip data may fail independently of the printed artwork.
Should I run media calibration or RFID calibration first?
Confirm correct media loading and physical label sensing first, then perform the model’s RFID tag calibration according to Zebra’s procedure.
Can I disable VOID labels to avoid waste?
That does not repair failed encodings and risks treating invalid labels as successful. Diagnose the source and use the approved reject/verification policy.
Bottom line
For a ZD500R voiding RFID labels, start with the correct media and printer hardware, then separate physical media calibration from RFID tag calibration. Validate the actual encoded chip data and job commands before assuming the printhead or reader has failed. This maintains traceability while limiting wasted tags and unnecessary changes.
Independent general troubleshooting information for shipping labels and thermal printers. Model-specific button sequences, cleaning supplies and service instructions can differ; consult your manufacturer's official documentation. Never alter a carrier-generated barcode.