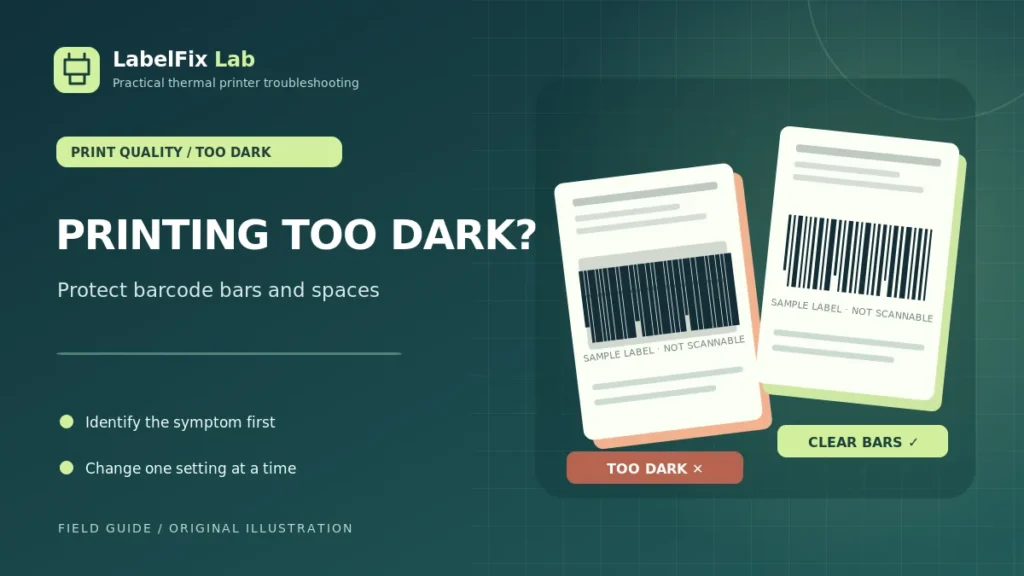
If your thermal shipping labels come out unusually dark, important barcode gaps can start to fill in. That can make an address look bold but turn a once-readable barcode into a dense block. The right fix is not simply to lower darkness to an arbitrary number: you need to identify whether the extra black comes from the original artwork, printer energy settings, media compatibility or residue.
What does “too dark” actually look like?
Not every dark label is defective. Thermal labels should have strong contrast, but adjacent bars must remain distinguishable and blank areas must not fill with black. Different patterns point to different causes:
| Observed print | Start by checking |
|---|---|
| Barcode bars look wider and white gaps shrink | Excess heat, media response, print speed |
| Black marks smear around characters | Stock coating, contamination, print settings |
| Entire label background becomes gray or dark | Wrong media, coating exposure, unusual heat |
| Dark spots appear at regular positions | Platen and media path, residue, test pattern |
| PDF itself already looks muddy or low-resolution | Source document quality, screenshot or raster export |
1. Compare the printed label with its original PDF
Open the shipping provider’s original PDF and zoom in on the barcode, address and surrounding white space. A carrier-generated vector barcode should generally show clear transitions between dark bars and white gaps. If the source already has fuzzy or merged-looking bars, a printer adjustment may not solve the underlying image problem.
Avoid rebuilding real tracking barcodes with a generic generator or altering their bar widths. If the shipping platform offers a fresh original, download that instead.
2. Inspect darkness and print-speed settings
Thermal printers use heat to create or transfer the image. Many models let you adjust darkness, density or heat and print speed. These controls affect the delivered energy and can interact with the label material, printhead and ribbon (where used).
Check the manufacturer’s recommended range before making changes. Write down the current values. If the label is excessively dark, make one small, reversible change and print a single sample. Do not assume that minimum darkness or maximum speed produces the best label.
3. Understand why extra heat may damage barcode readability
When printed bars expand sideways, the white intervals between them become too narrow. A handheld scanner may still read some copies, but that does not guarantee a carrier’s sorting equipment will accept the label. Compare the printed symbol with the original document and confirm all required spaces and quiet zones remain clear.
If the barcode actually fails to scan, see our shipping barcode troubleshooting guide, which also covers scaling and physical damage.
4. Check that the roll matches the printing method
Direct-thermal stock uses a heat-sensitive coating. Thermal-transfer systems use a compatible ribbon and face stock. Different media respond differently to the same print settings, so a new roll can look much darker or lighter even if the printer itself hasn’t changed.
Read the product’s specification and the printer model’s approved materials. Our direct thermal vs thermal transfer guide explains the basic differences. Do not try to correct fundamentally incompatible stock by increasing heat to maximum.
5. Inspect the printhead and media path safely
Adhesive buildup, dust, unsuitable cleaning products or damaged material can affect how a label passes the printhead. With power disconnected as the manufacturer instructs and with the printhead cooled, inspect and clean only accessible parts using the approved procedure.
Do not scrape the printhead, use household solvents or remove protective covers without guidance. If a dark stripe repeats in the same position after approved cleaning, refer to our guide to thermal printer lines and streaks rather than making increasingly extreme heat adjustments.
6. Separate application settings from printer settings
Some printing applications and printer drivers expose their own darkness or print-speed presets. A label printer’s saved device configuration may differ from the settings used by a particular application. Record both the driver preset and the printer’s current configuration before changing them.
If a manufacturer-generated test label is correct but a shipping application’s labels are too dark, first compare the selected print queue, driver and document handling. This can help isolate software from device or media behavior.
7. Avoid shrinking or rasterizing the entire shipping label
Excessive darkness can be made worse by printing a low-resolution screenshot rather than an original PDF. Scaling an image can alter the apparent thickness of narrow bars and the quality of small text. A standard portrait 4×6 shipping label measures 101.6 × 152.4 mm. Use our free 4×6 PDF Label Size Checker to inspect the PDF page dimensions before printing.
The tool checks dimensions, orientation and page count; it cannot certify barcode readability or inspect ink density.
8. Run a controlled before-and-after test
- Save the original printer or driver darkness setting.
- Print one known-good label on compatible stock.
- Change only one supported heat or speed control in a small increment.
- Print again using the same document and roll.
- Check text clarity, barcode bars, white gaps, edges and surrounding margins.
- Keep the setting only if the full label improves; otherwise revert.
Do not treat scanning successfully once with a phone as a definitive quality test. Use an appropriate scanner and the shipping provider’s published requirements when available.
When to seek help rather than increasing or decreasing heat further
If the printer’s built-in test and multiple approved rolls produce similar dark defects after documented maintenance and reasonable settings, the issue may need model-specific service. Capture the model, stock type, driver, speed/darkness values and a safe sample output for support.
Frequently asked questions
Why is my shipping label barcode printing as a black block?
One possible cause is excessive thermal energy making bars spread and gaps merge. Also inspect the original artwork, print scaling and label material before adjusting the printer.
Should I turn printer darkness to zero?
Not as a universal solution. Start from manufacturer-recommended settings and make small controlled adjustments. Very low energy can produce faded or missing bars instead.
Can a different label roll cause dark printing?
Yes. Direct-thermal coatings and thermal-transfer stock and ribbons differ. Verify compatibility and test approved consumables rather than assuming every roll responds identically.
Does a dark barcode always fail to scan?
No. The concern is whether bars, spaces and quiet zones remain within the barcode’s scanning requirements. An overly dense appearance is a reason to investigate, not definitive proof of failure.
Safety and accuracy: These are general diagnostic checks, not model-specific operating instructions. Follow the printer and shipping carrier documentation, especially for heat, cleaning and barcode standards.
Independent general troubleshooting information for shipping labels and thermal printers. Model-specific button sequences, cleaning supplies and service instructions can differ; consult your manufacturer's official documentation. Never alter a carrier-generated barcode.