Quick answer: A UPS shipping label printer should receive the authorized label in a format compatible with its physical stock, printer hardware and supported print workflow. When a 4 × 6 shipping label prints too small, goes sideways or leaves an extra blank sticker, compare the original document’s page size, the installed roll and the application’s printer settings before recalibrating or reinstalling the driver.
UPS labels may be produced from different authorized account, browser or software workflows. This guide explains print setup and troubleshooting without claiming that one menu name, print integration, or thermal-label option applies to every UPS account. If you’re specifically using WorldShip and only blank labels emerge, also see our dedicated UPS WorldShip blank-label diagnosis. That is a separate failure from ordinary PDF size mismatch.
Which UPS label-printing problem do you have?
| Symptom | Check this layer first | Why it matters |
|---|---|---|
| A tiny label appears in the center of 4 × 6 stock | Original PDF page dimensions and Fit/Shrink | Fitting a Letter canvas onto 4 × 6 reduces all artwork, including barcode bars |
| Label is cropped near the right edge | Printer’s actual printable width and page orientation | Supported media width and imageable width may differ |
| Blank labels feed while the shipping app says printed | Printer diagnostic, print method and data path | Job completion does not prove a physical image was produced |
| Two stickers emerge for one page | PDF page count, paper length, sensor registration or duplicate job | Each cause requires a different fix |
| Barcode is visible but won’t scan | Scaling, clipping, heat/speed, stock and quiet zones | A readable-looking print can still be unsuitable for scanning |
| Print command goes to the wrong printer | Queue choice, port or integration selection | Multiple installed print queues can have similar names |
1. Obtain the original UPS label through the authorized workflow
Start with the shipping label generated for your real parcel through the supported UPS or connected-service workflow. An order receipt, tracking page, confirmation email or screenshot is not automatically a label that contains all required carrier data. Confirm that the label is associated with the correct destination, service and shipment before printing multiple copies.
UPS-related software integrations can use a PDF output path, a vendor-supported desktop print component or direct printer-language data. Determine which your operation actually uses. A browser PDF setting will not necessarily control a raw label command sent directly through a shipping application. If the original print file is damaged or incomplete, request a new authorized export or reprint rather than redrawing barcode elements.
2. Compare the source page with the physical 4 × 6 roll
A true portrait 4 × 6-inch PDF page measures 101.6 × 152.4 mm, equivalent to 288 × 432 PDF points. US Letter is 8.5 × 11 inches or 612 × 792 points. The source document’s canvas may be larger than the visible label; a 4 × 6 graphic inside a Letter page does not automatically print at 4 × 6 physical size.
Inspect the original PDF’s page properties before using the print dialog. Our PDF Size Checker can report its dimensions without sending file contents to a conversion server. It doesn’t validate postage or barcodes. If the service offers an authorized thermal-label layout, prefer that original format over manually scaling a full-sheet document.
3. Check thermal label stock and printer compatibility
Read the exact printer model’s specifications for media width, printable width, print method and supported stock. A printer may accept a four-inch roll but be unable to image right to its extreme edge. A 100 × 150 mm stock is not identical to a 101.6 × 152.4 mm 4 × 6 roll, so avoid assuming approximate dimensions are acceptable for every carrier or printer.
Check whether the hardware expects direct-thermal stock or a thermal-transfer consumable combination. Incorrectly loaded or incompatible media can produce blank output that no UPS print option can repair. For die-cut stock, the printer’s media mode should match gap detection and the physical pitch.
4. Choose a supported printer driver and job destination
On the host computer, confirm that the selected print destination is the actual thermal printer. A second, older queue or a virtual “Print to PDF” device may remain selected after an operating-system update. A USB cable connected to a computer does not prove that the intended queue is using that device, and a network printer may be assigned to a stale address.
Use the manufacturer-approved driver or documented integration for the precise hardware and OS. Avoid installing unknown generic printer drivers simply because a shipping program reports an unsuccessful print. Note the port, model and recent changes before replacing any working setup.
5. Set the page size and scaling in the correct layer
For a native 4 × 6 PDF with compatible 4 × 6 media, start at Actual Size / 100%. Avoid Fit, Shrink or Multiple Pages per Sheet unless the specific documented workflow requires it. If the original document is Letter-sized, however, Actual Size on a smaller sticker may crop most of its contents. In that case, obtain an appropriate authorized source format or use the supported full-sheet workflow.
In direct shipping-software integration, paper size may be set inside the shipping application and can override the OS default. When the same printer succeeds with a standalone sample PDF but fails with a UPS application, investigate its job settings and output path first.
6. Distinguish print registration from artwork alignment
If an extra blank label feeds, check the document’s page count, print range and the driver label length. A printer that misdetects the next gap can advance into the following sticker, especially after a roll change. The manufacturer-supported calibration process is intended for that kind of registration problem; it does not change a Letter page into a 4 × 6 page.
If labels feed exactly one at a time but the image starts too far to the left or top, examine the printer’s supported origin and stock alignment options. Media guides, image orientation and actual printable width are more relevant than a full sensor reset in that situation.
7. Verify the printer independently of UPS software
Use a documented printer-generated test or harmless manufacturer sample to check whether the device can create a visible image. Next print our 4 × 6 SAMPLE alignment PDF, which deliberately contains no valid postage or tracking barcode. Only then compare the original authorized UPS label.
Internal test fails: look at compatible stock, print method, ribbon where needed and device status. Internal test and sample work but UPS label fails: check the shipping document, queue, integration and job language. This order isolates problems without wasting customer labels.
8. Special case: UPS WorldShip outputs blank stock
A WorldShip user might see a shipment completed while the physical printer advances white labels. The first question is whether a visible self-test prints correctly; the second is how WorldShip is sending the job. Printer-generated imaging and application/driver output are separate layers. If you see this specific symptom, our UPS WorldShip printing blank labels article has the focused decision tree. Do not replace a printhead until you’ve established that the device itself fails supported tests.
Likewise, do not copy screenshots of older WorldShip dialogs or assume the same shipping module exists in every installation. Record the current app version and exact printer before following official support instructions for that workflow.
9. Barcode quality: avoid a successful-looking but unusable label
Inspect the complete UPS shipping label before attaching it. The barcode’s quiet spaces, routing symbols and human-readable destination information must not be clipped or distorted. Printing a low-resolution screenshot or stretching bars in a graphics editor may make the code difficult to scan even if the page looks visually neat.
When the device produces blurry or faded bars, examine media compatibility, printhead condition, documented print speed and darkness settings. More heat is not always safer: it can make bars wider or cause thermal media to darken excessively. Use a carrier-compliant original and the appropriate operational verification rather than assuming a mobile barcode app can certify it.
Practical example: UPS label is tiny on the thermal stock
A shipping clerk downloads a PDF that reports 8.5 × 11 inches, loads a 4 × 6 roll and selects Fit in the browser. The label artwork sits inside the Letter page and gets reduced alongside the full canvas, producing a tiny printed code. A correct native 4 × 6 output from the authorized shipping workflow would avoid that full-page reduction. A sensor calibration would not correct the source dimensions.
Practical example: labels print correctly once, then drift downward
The first page fits, but every later label begins a few millimeters farther from the edge. That pattern suggests a repeat-length or media registration issue rather than a separate scaling problem. Measure the stock, check the gap/black-mark mode and use the device’s documented calibration if justified. Compare a harmless sequence of repeated samples, not multiple paid UPS shipments.
Practical example: PDF printing works but WorldShip does not
A standalone SAMPLE PDF prints clearly through the OS queue while WorldShip produces no image. That result narrows the problem to the WorldShip print workflow, selected integration, data format or its printer mapping. Keep the hardware configuration stable while checking the current software’s supported options; avoid swapping hardware before understanding the job path.
Print-check checklist before releasing a shipment
- Verify the label was issued through an authorized UPS or supported shipping service.
- Compare source page size, physical stock and driver/application preset.
- Check correct orientation, printable margins and barcode quiet zones.
- Ensure the full address and routing marks appear and are readable.
- Use approved testing and device diagnostics without altering live postage data.
- Track copies and dispose of rejected labels containing customer information securely.
Frequently asked questions
Do I need a special printer for UPS shipping labels?
The hardware and label format need to be compatible with the selected UPS workflow. Depending on the authorized label document and current service requirements, compatible thermal or office printing may be possible. Check model specifications and carrier instructions.
What is the correct 4 × 6 UPS PDF page size?
A native 4 × 6-inch page is exactly 101.6 × 152.4 mm or 288 × 432 PDF points. This describes geometry, not a guarantee that every UPS service provides or accepts that format.
Why does my UPS label print tiny?
Start by checking whether the original PDF is Letter-sized and being fitted onto smaller stock, or whether a correctly sized document is being shrunk by the reader or driver.
Why is WorldShip printing blank labels while PDF tests work?
The software-to-printer integration, selected queue or job format may differ from the working PDF path. Compare a supported internal printer test and review the dedicated WorldShip diagnostic guide.
Will recalibrating fix a clipped barcode?
Not when the source PDF or print origin is wrong. Calibration is primarily for locating label boundaries, not changing document geometry or the printer’s maximum imageable width.
Related LabelFix Lab guides
- UPS WorldShip blank thermal labels: software-specific checks
- Driver keeps reverting to Letter paper
- 4 × 6 shipping labels printing too small
- Shipping label prints sideways or cut off
- Shipping barcode not scanning
- Print a harmless 4 × 6 SAMPLE PDF
- Check physical dimensions of a shipping-label PDF
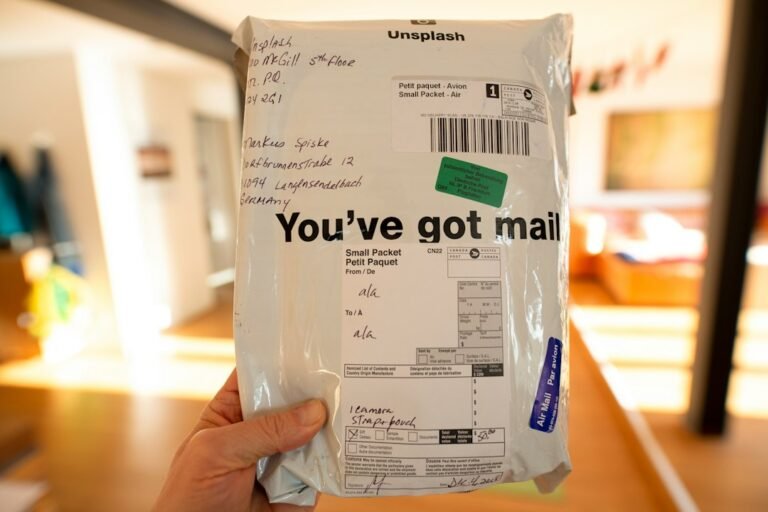
Featured image: Mediamodifier / Unsplash. Illustrative parcel photograph, not a UPS carrier-issued label.
Editorial note: The page measurements are precise arithmetic; printer and software options are not verified against a specific current UPS account or hardware device. Check official UPS instructions and the exact printer’s supported documentation before changing production print settings.
Independent general troubleshooting information for shipping labels and thermal printers. Model-specific button sequences, cleaning supplies and service instructions can differ; consult your manufacturer's official documentation. Never alter a carrier-generated barcode.