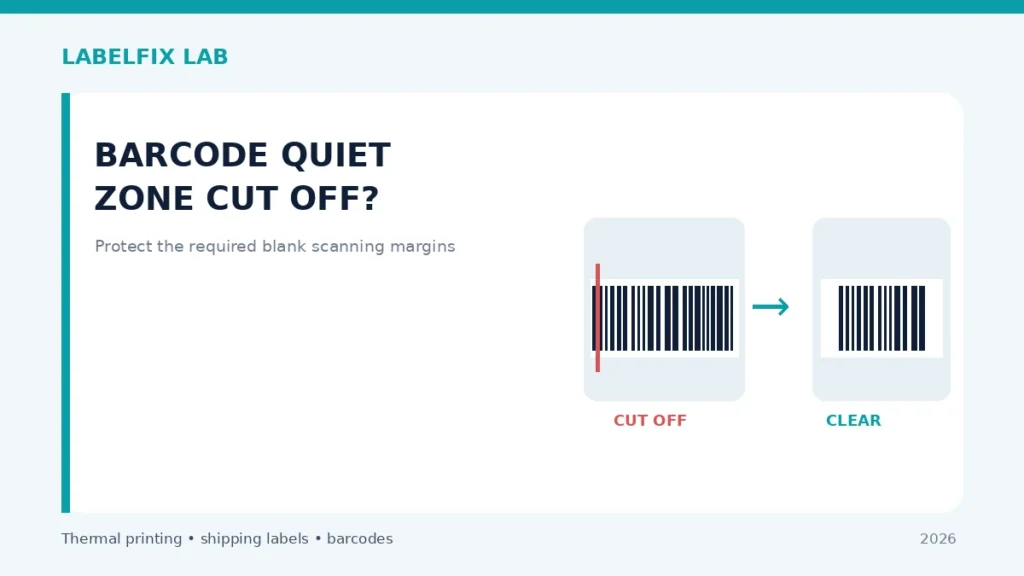
The blank space immediately beside a barcode is not meaningless decoration. Many symbologies rely on an appropriately clear quiet zone so a reader can distinguish the beginning and end of the symbol. If bars reach the sticker edge or adjacent text touches the code, increasing darkness will not restore a missing clear margin.
Before changing settings: Use a non-live sample, record the exact hardware and software versions, and keep real tracking numbers and customer details out of screenshots shared publicly.
Symptoms and what they suggest
| What happens | First direction to investigate |
|---|---|
| Bars touch the physical label edge | Printable area or horizontal placement mismatch |
| Original PDF already cuts through bars or clear area | Source export or embedded crop |
| Only one printer trims the same code | Driver stock width, margins or alignment |
| Bars clear but scanner still fails | Other causes: contrast, symbol type, device support |
Step-by-step diagnostic checks
1. Identify the actual barcode boundary
Look at the full carrier-generated page, not just a crop of the bars. The quiet zone is the required unprinted region adjacent to the symbol; the necessary width depends on the barcode specification. Don’t invent a fixed millimeter rule and apply it to every carrier.
2. Compare digital and printed margins
If the original PDF already contains a code against the page edge, ask the source platform for a correct export. If the PDF has clear space but the physical print removes it, investigate page scaling, printer media width and the position of the print origin.
3. Check page dimensions before changing X offsets
Use the PDF size checker to determine whether the page is native 4×6, Letter, A4 or a custom size. The checker does not certify the artwork. A correct page size is necessary for accurate scaling but does not guarantee the barcode clear region is intact.
4. Inspect 100% and Fit to Page behavior carefully
Fit options may shrink or enlarge the artwork; auto-rotate and auto-center may reposition it. Change one setting at a time with a non-live document, keeping carrier-required dimensions in mind. Never cut away whitespace merely to make text look bigger.
5. Check the lateral guides and roll tracking
Consistent clipping at the same edge suggests a fixed layout or offset; drifting clipping between labels can suggest stock tracking. See off-center label troubleshooting for a controlled repeat-print comparison.
6. Avoid applying opaque material over the clear region
Tape, dark borders, marker ink or overprinted text can interfere with symbol detection. Use only carrier-approved placement and coverings. A clear margin visible on screen can be obscured after a parcel is wrapped or another sticker overlaps it.
7. Use a supported reader without overclaiming validation
A phone successfully reading the label is an informal test. If the carrier specifies a formal barcode quality or layout standard, follow its documented acceptance process or suitable verifier. Don’t conclude a quiet zone is adequate from one lucky scan.
8. Regenerate and replace compromised labels
For real shipments, download a clean label from the carrier or shipping provider. Do not redraw bars, fabricate a replacement quiet zone around cropped code data or cover the damaged symbol with another unverified barcode.
How to interpret the results
If the original source has a clear zone and print output removes it, fix stock size and alignment. If the PDF itself has missing barcode data or an incorrect crop, obtain the official source again. If the printed code has adequate margins but fails, continue with barcode scanning diagnosis.
Verify before returning to production
Record what changed, test with the original supported document or test symbol and confirm the actual value received by the application. For a physical shipping label, inspect the whole barcode, address, routing marks and surrounding clear area. If the specific carrier or device manufacturer publishes requirements, those take priority over general guidance.
Worked example: a hypothetical diagnostic case
Imagine a correctly sized PDF with a barcode positioned several millimeters away from the page edge. The physical print removes nearly all of that clear strip on the right side. Print three non-live copies and inspect whether the clipping is stable. A consistent shift supports checking stock width, the driver X offset and the supported printable area. If the barcode moves left and right between copies, inspect guide tracking and roll seating. By contrast, if the source PDF already shows bars touching the page boundary, no mechanical adjustment can restore missing original data. Request the correct carrier export rather than drawing in an invented margin.
What not to conclude from one test
There is no single clearance measurement that applies to all barcode types. Always distinguish a safe page margin from the specification-defined quiet zone of the actual symbol, and keep labels free of overlapping tape or dark markings.
For an accountable troubleshooting record, note the exact model, source document or sample, current interface and settings, the test performed, and which symptom changed. Keep production tracking numbers and customer information private. This is an illustrative case, not a claim of first-hand testing.
Frequently asked questions
Can I just add white space to the PDF?
A safe fix depends on carrier requirements and whether the barcode artwork is intact. Prefer a correctly exported native label.
Is there one quiet-zone size for all barcodes?
No. Requirements depend on the specific barcode symbology and its application specification.
Why does clipping only happen on one printer?
Driver dimensions, horizontal offset, printable area or media tracking may differ. Compare one controlled print.
Editorial note: This is independent, general troubleshooting advice, not a scanner certification or a claim that we tested every device. See our technical verification policy and consult the exact scanner and carrier documentation for model-specific steps.
Independent general troubleshooting information for shipping labels and thermal printers. Model-specific button sequences, cleaning supplies and service instructions can differ; consult your manufacturer's official documentation. Never alter a carrier-generated barcode.