Quick answer: If your Zebra ZD410 keeps skipping labels, the next blank sticker is not automatically a software fault. The ZD410 relies on its movable media sensor, the selected gap/mark/continuous media mode, accurate calibration, and the expected label length. Start with a properly loaded roll, align the sensor for that stock, then run the model’s documented SmartCal procedure. If it still cannot reliably detect the boundary, use the official manual-calibration workflow instead of repeatedly resetting the printer.
This guide focuses on the ZD410 desktop printer. Other Zebra devices may have different button sequences, status indicators and media paths. Record the installed stock size, whether it is die-cut with a gap, black-marked, notched or continuous, and whether the problem began immediately after a roll or driver change.
Diagnose the exact skipping pattern first
| What you see | Most useful suspicion | First comparison |
|---|---|---|
| One extra blank label every print | Gap position or expected label pitch | Feed one label and observe the stop point |
| Several labels feed before an error | Sensor cannot detect the expected boundary | Confirm gap/mark mode and sensor location |
| First label is correct; later images drift | Mismatch between actual pitch and format length | Measure liner-to-liner distance and compare settings |
| Only one new roll fails | Stock, marks, transparency or loading difference | Compare with known-good original stock |
| Internal feed is correct but PDF output skips | Host driver or source document size | Print a simple native test before changing media settings |
1. Identify your actual media, not just the label width
A shipping roll described as “4 × 6” is not enough to configure registration. Measure the adhesive label’s physical width and height, and also inspect the distance to the start of the next label. With die-cut gap labels, the pitch includes the small space between stickers. For black-mark media, a dark mark on the liner tells the sensor where one unit ends. Continuous media has no repeated boundary and must be handled through a supported length setting.
Read the packaging and examine the back of the liner against a light. A nearly transparent backing, a different gap size or heavy preprinting can change the sensor’s reading even if two rolls share the same nominal width. Do not assume the correct setting for another printer is correct for the ZD410.
2. Reseat the roll and inspect the entire feed path
Power down or open the printer only as described in the ZD410 user guide. Confirm the roll turns freely, the printable surface faces the printhead as required, and the liner follows the manufacturer’s media path. Guide pieces should keep the web aligned without crushing or buckling it. Remove loose scraps of labels and adhesive debris with an approved, safe maintenance method; do not probe the mechanism with a sharp metal tool.
Check whether a peeled label has left an empty liner space or whether the media has wandered sideways. Either can fool registration and create an apparently intermittent skip. If the roll is unusually tight, binding at the core or mounted off-center, correct that physical condition before doing calibration.
3. Set the movable sensor to match gap or black-mark stock
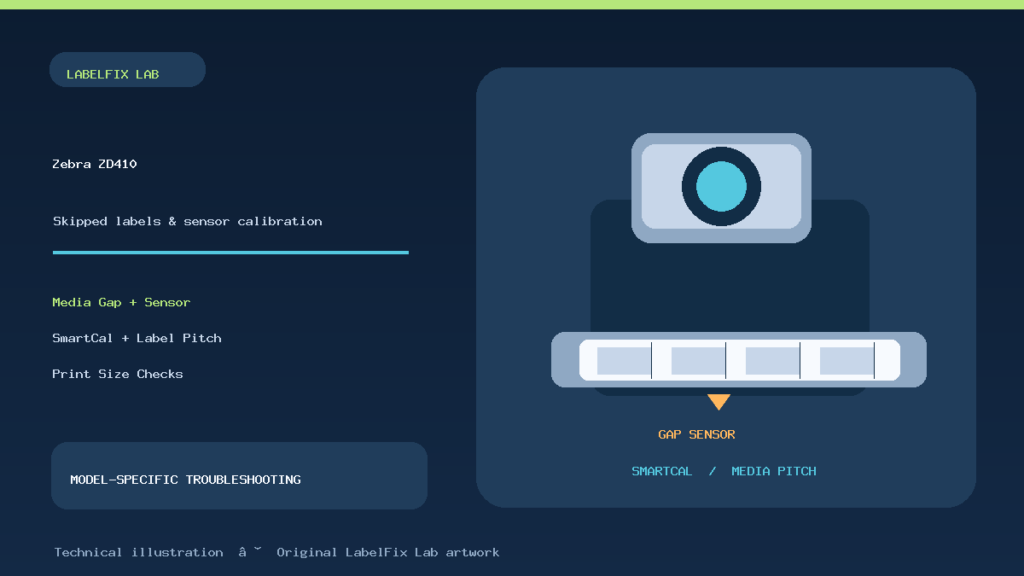
The movable sensor is a key ZD410-specific check. For regular web/gap media, Zebra documents its default center sensing position. For a black mark or notch located away from the centerline, the sensor needs to detect that actual mark or notch. A sensor sitting beside the mark cannot identify a valid stop even when labels are fully loaded.
Inspect the mark location on the back of the liner and compare it with the documented sensor reference points. With preprinted media, avoid a position where ordinary artwork could mimic a registration mark. Use Zebra’s official ZD410 movable-sensor adjustment instructions rather than guessing how far to move it.
4. Run SmartCal after fixing the loaded stock
Zebra’s SmartCal calibration automatically measures the installed label material and determines whether its registration behavior resembles web/gap, black-line/notch or continuous media. For the ZD410, the official procedure begins with properly loaded media, a closed cover and the power on. The guide specifies pressing PAUSE and CANCEL together for two seconds; the printer advances material, measures several labels and then returns to Ready if calibration succeeds.
This operation feeds and consumes labels, so keep a little spare stock. Allow the cycle to finish and test the FEED behavior before sending a large shipping batch. If calibration fails, the answer is not necessarily to repeat the same key combination ten times; recheck the sensor location and stock type first. Zebra documents a distinct manual calibration for cases SmartCal does not recognize.
5. When SmartCal fails, perform documented manual calibration
Manual calibration is an advanced diagnostic step, not an everyday power-cycle ritual. Zebra’s ZD410 guide describes entering Advanced Mode, selecting the corresponding PAUSE phase, positioning the media sensor, and measuring both bare liner and a label-bearing section. The workflow requires temporarily exposing approximately 80 mm (3 inches) of liner and feeding several labels while the printer learns the boundary.
Read the complete ZD410 manual-calibration instructions with the printer in front of you. Do not copy only part of the sequence from an unrelated Zebra model. A failed attempt can mean the sensor location still needs adjustment, the media is unsuitable or the liner is difficult to detect.
6. Separate the label’s physical pitch from the print format
The printer’s recognition of a gap and the host’s intended label length are related but different. For example, a shipping platform might supply a 4 × 6-inch PDF while a driver remains set to a smaller tag or continuous receipt media. This can lead to incorrect advancement or images crossing sticker boundaries, even if the roll itself feeds correctly in a standalone test.
Compare four values: the actual physical stock, the print queue’s media size, the label editor or shipping application’s selected format, and the source document’s native page dimensions. A genuine 4 × 6-inch PDF is 101.6 × 152.4 mm, or 288 × 432 PDF points. Avoid “Fit to page” when it unexpectedly enlarges or shrinks a carrier label; start with native sizing where the original source and stock match. Our Zebra printer label-size guide covers this cross-check.
7. Distinguish hardware feeding from a bad PDF job
Before blaming the ZD410’s sensor, cancel any duplicate host jobs and perform a manufacturer-supported feed or diagnostic. If the printer advances exactly one label at a time without a PC job but skips only after the shipping website sends a PDF, inspect the application’s page format, queue preset and scaling first. If it also misses gaps without a computer, concentrate on physical loading, sensor calibration and material detection.
Do not use a live customer’s shipping label for uncontrolled experiments. Print a harmless sample using the same stock, then one actual job after the path is stable. This prevents accidental duplicate carrier labels and helps you identify which change made the difference.
8. Check the platen and printhead only after sensor and media checks
Zebra’s troubleshooting table also lists a slipping or damaged platen roller as a possible cause of poor media registration. A roller that cannot grip the liner consistently may move it less than intended. Look for obvious label adhesive, uneven wear or unusual resistance while following the prescribed safety precautions. The problem might appear to be “calibration” even though the stock physically slips.
Cleaning must follow the official manual and use compatible supplies. Do not spray random solvent into the printer or manually force the carriage. If you see roller damage or persistent slipping, seek model-specific service advice rather than raising print darkness or altering an unrelated ZPL coordinate.
9. Why the ZD410 skips only after switching roll brands
Two vendors can sell labels with an identical nominal face size but different liner translucency, gap length, notch position or adhesive behavior. The old calibration and media preset may no longer represent what the sensor sees. That is especially likely when the original roll still behaves correctly. Photograph both materials side by side and note any changes before making adjustments.
Run the supported calibration for the newly loaded stock, then inspect whether the selected driver media mode agrees. If the new material cannot be detected reliably despite correct positioning and manual calibration, test a vendor-approved roll or ask the material supplier for compatibility data.
10. Avoid resetting or changing ZPL commands blindly
Some print jobs contain ZPL commands that set media type, label length or print origin. Our ZPL label-shift troubleshooting article discusses length and origin parameters. However, changing ^LL or other commands is not a substitute for having the physical sensor detect a gap. Document the current printer configuration before any advanced change.
Factory resetting a shared or networked label printer may erase working connectivity, media and communication settings. First isolate whether the fault occurs with the same roll and a local test, and choose the smallest reversible adjustment that matches the evidence.
Practical ZD410 skipping-label checklist
- Record the exact model, failed roll and when skipping started.
- Identify gap, mark, notch or continuous stock and measure physical pitch.
- Reload the liner path and position the movable sensor correctly.
- Run the official ZD410 SmartCal process and observe the result.
- If necessary, use the full manual-calibration instructions.
- Compare native feed with one controlled host print.
- Match the driver, shipping file and actual label size.
- Inspect platen grip and seek support if registration remains erratic.
Frequently asked questions
Why does my Zebra ZD410 feed two labels instead of one?
The sensor may not identify the expected boundary, the stock may be positioned incorrectly, or the configured label length may not match the actual media. Separate a standalone feed test from a host print to narrow it down.
How do I calibrate a Zebra ZD410?
With the correct stock loaded and the cover closed, Zebra documents a two-second PAUSE-and-CANCEL SmartCal action. Follow the official model instructions and let the printer feed several samples before testing.
Can I calibrate a ZD410 with black-mark labels?
Yes, with compatible media and correct sensor position. A mark away from the sensing point will still fail, so align it first and use supported calibration.
Does every skipped label mean the sensor is broken?
No. Misloading, mismatched media, print job format, stock differences and platen slippage can produce similar symptoms. A service diagnosis comes after those controlled comparisons.
Official Zebra references
- ZD410: Resolve Print Issues
- ZD410: SmartCal calibration
- ZD410: manual calibration
- ZD410: sensor profile
Editorial scope: These are manufacturer-based troubleshooting steps, not a claim of physical testing on every ZD410 hardware revision or firmware. Follow the instructions matching your exact configuration.
Independent general troubleshooting information for shipping labels and thermal printers. Model-specific button sequences, cleaning supplies and service instructions can differ; consult your manufacturer's official documentation. Never alter a carrier-generated barcode.